In this post, we will see how to create a View Detail, using the dynamic list created in the post: SwiftUI – Static and Dynamic List.
First of all, we modify the struct User adding a new property called “Info”:
struct User: Identifiable {
    var id: Int
    var Username:String
    var Password:String
    var Info: String
}
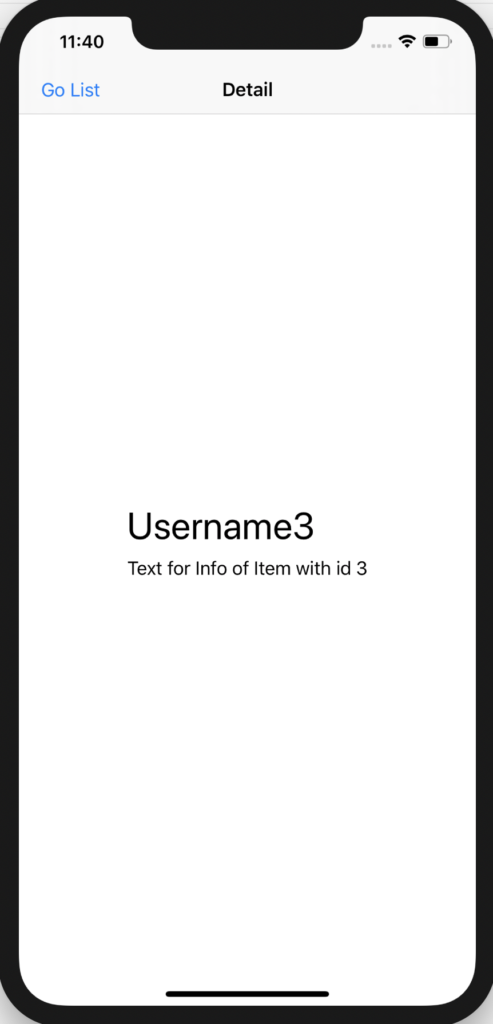
Then, we create a SwiftUI View called “DetailUser” that, we will use to show the details of an User object:
[DETAILUSER.SWIFT]
import SwiftUI

struct DetailUser: View {
    // it is a property wrapper that allows any view access to global dependencies
    @Environment(\.presentationMode) var presentationMode

    var objUser:User
    var body: some View {
        VStack(alignment: .leading, spacing: 8) {
            Text(objUser.Username).font(.largeTitle)
            Text(objUser.Info)
        }
        // Define the title of the View
        .padding().navigationBarTitle("Detail", displayMode: .inline)
        // Hide the back button
        .navigationBarBackButtonHidden(true)
        // Add your custom back button here
        .navigationBarItems(leading:
            Button(action: {
                // define an action
                self.presentationMode.wrappedValue.dismiss()
            }) {
                // Define the button's text
                Text("Go List")
        })
    }
}

// These lines of code mean that whatever code is wrapped within these commands, will only be shown in the preview for debugging purposes.
#if DEBUG
struct DetailUser_Previews: PreviewProvider {
    static var previews: some View {
        DetailUser(objUser: User(id: 1, Username: "test", Password: "test", Info: "test"))
    }
}
#endif
Finally, we have to add the DetailUser view into the file “ContentViewList.swift”:
[CONTENTVIEWLIST.SWIFT]
import SwiftUI
struct ContentViewList: View {
// define a varible called lstUser
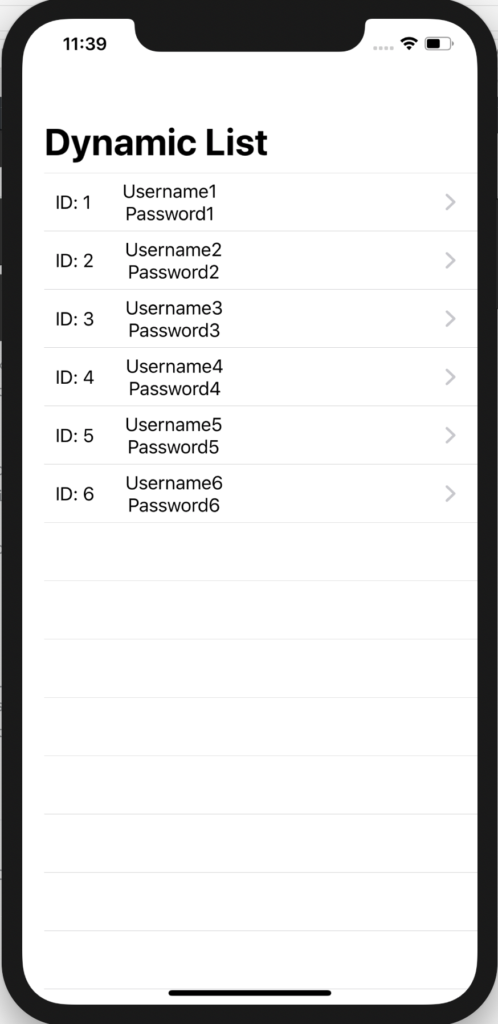
let lstUser: [User] = [
.init(id: 1, Username: "Username1", Password: "Password1", Info: "Text for Info of Item with id 1"),
.init(id: 2, Username: "Username2", Password: "Password2", Info: "Text for Info of Item with id 2"),
.init(id: 3, Username: "Username3", Password: "Password3", Info: "Text for Info of Item with id 3"),
.init(id: 4, Username: "Username4", Password: "Password4", Info: "Text for Info of Item with id 4"),
.init(id: 5, Username: "Username5", Password: "Password5", Info: "Text for Info of Item with id 5"),
.init(id: 6, Username: "Username6", Password: "Password6", Info: "Text for Info of Item with id 6")]
var body: some View {
// Defintion of a Navigation Controller
NavigationView{
// put the array into a List
List(lstUser) { item in
NavigationLink(destination: DetailUser(objUser: item))
{
HStack
{
Text("ID: \(item.id)")
VStack
{
Text(item.Username)
Text(item.Password)
}.padding(.leading, 20)
}.padding(.leading, 10)
}
}.navigationBarTitle("Dynamic List")
}
}
}
struct ContentViewList_Previews: PreviewProvider {
static var previews: some View {
ContentViewList()
}
}
Now, if we run the application, this will be the result: