
In this post, we will see how to create a simple Azure Functions that read an Azure Service Bus Queue, using Visual Studio.
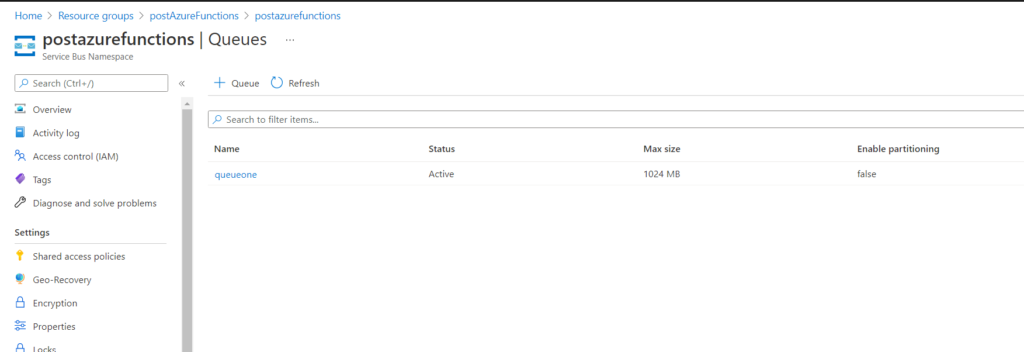
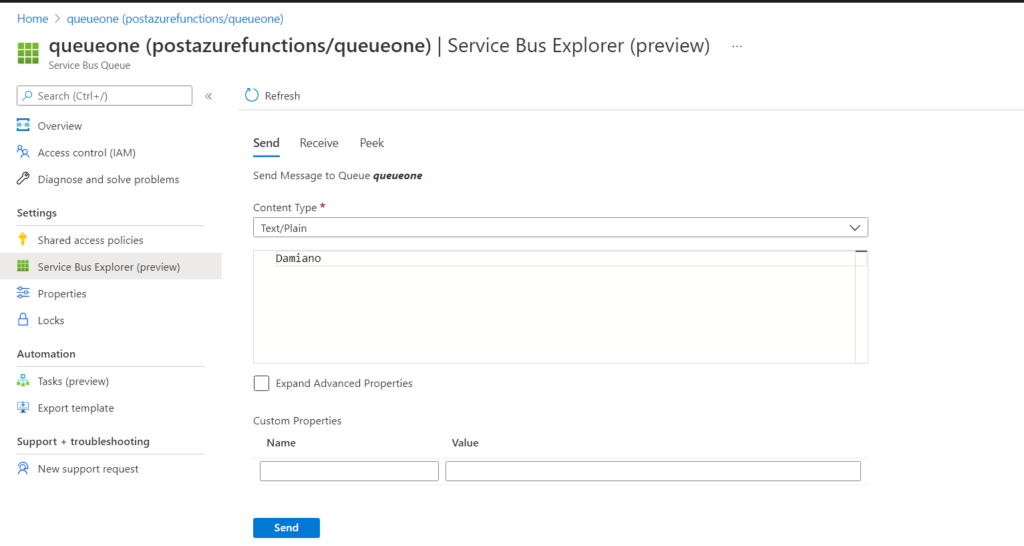
First of all, we go to Azure Portal and we define a Service Bus (called postazurefunctions), where we will create a queue called queueone:
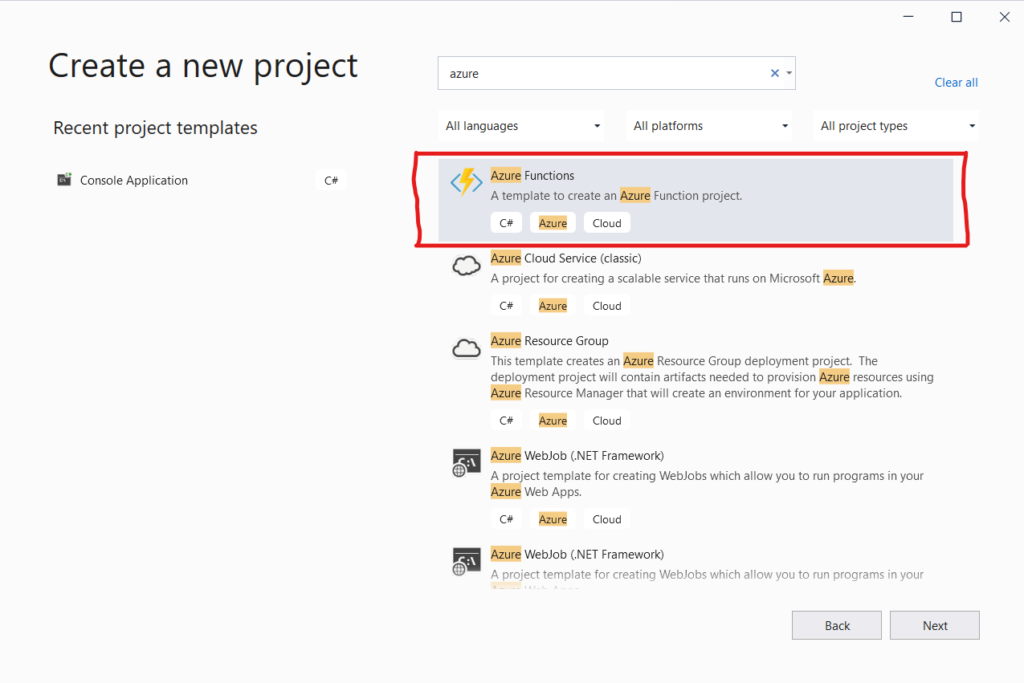
Now, we open Visual Studio and we create an Azure Functions project:
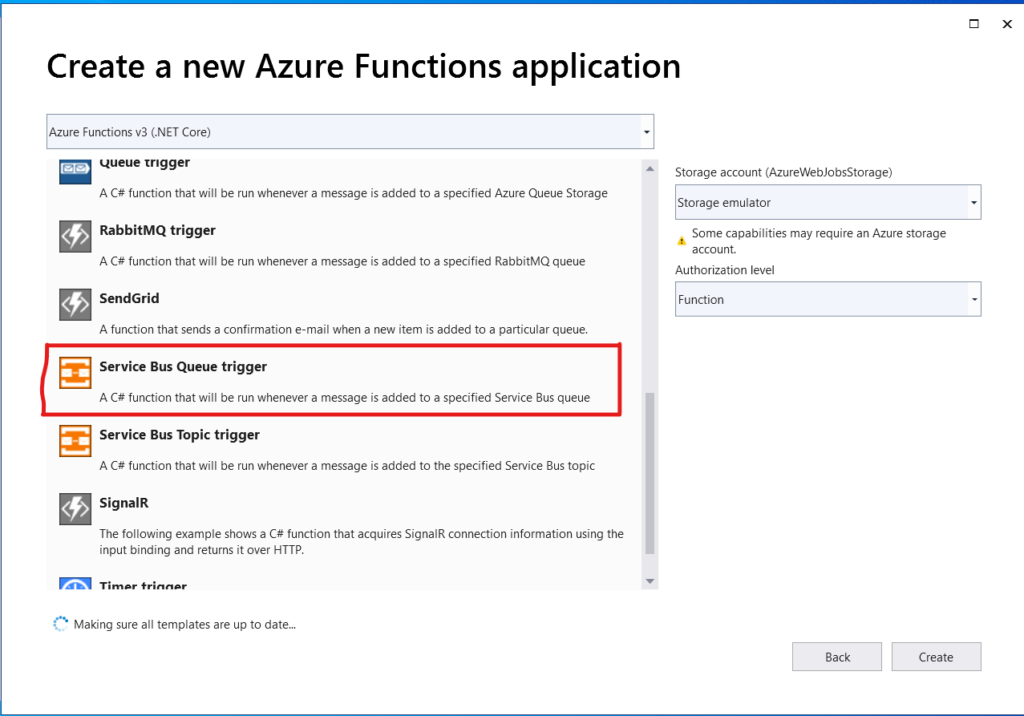
Then, we choose a “Trigger” that we want to use:
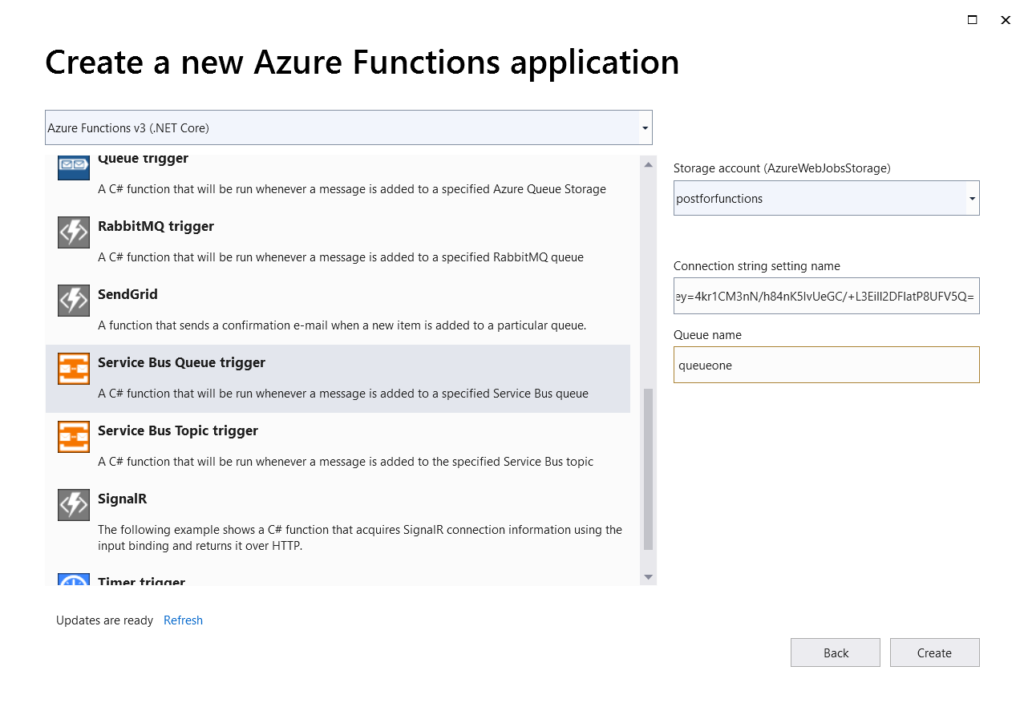
and finally, we have to choose the Storage Account, the Queue connection string and the Queue name:
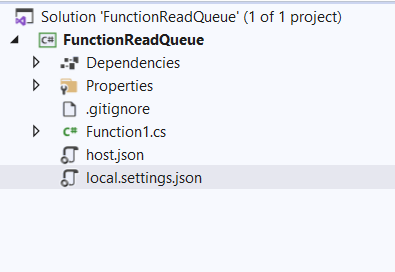
In the end, this will be our project:
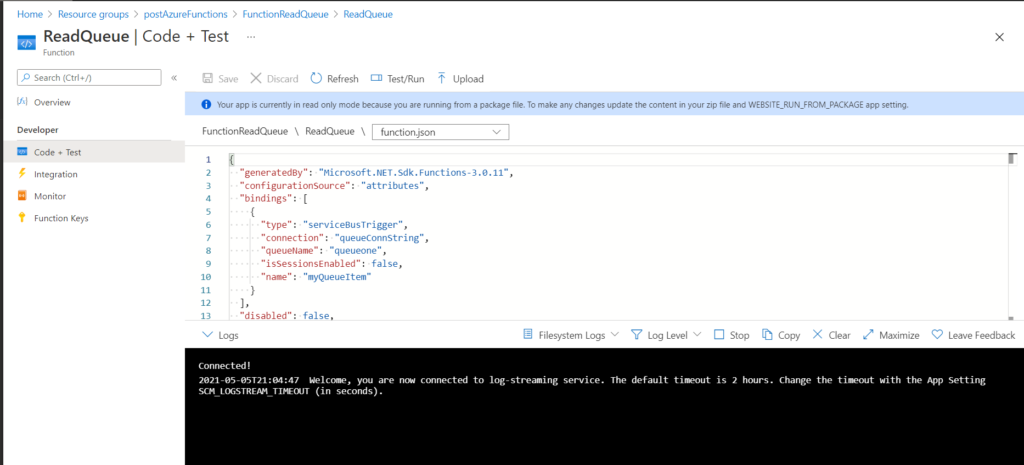
The first thing to do, is to insert the Queue Connection string in local.settings.json and use this parameter into Functions1.cs:
[LOCAL.SETTINGS.JSON]
{
  "IsEncrypted": false,
  "Values":
  {
    "AzureWebJobsStorage": "DefaultEndpointsProtocol=https;AccountName=postforfunctions;AccountKey=f9323THLPdQ7l8SSqnRwo+jb0fcBxIZchSTXf9FESf2XET72fY3vzeqPeaRqdvK3TRelZzJrAa2wmDD2tdv8ow==;BlobEndpoint=https://postforfunctions.blob.core.windows.net/;TableEndpoint=https://postforfunctions.table.core.windows.net/;QueueEndpoint=https://postforfunctions.queue.core.windows.net/;FileEndpoint=https://postforfunctions.file.core.windows.net/",
    "queueConnString": "Endpoint=sb://postazurefunctions.servicebus.windows.net/;SharedAccessKeyName=RootManageSharedAccessKey;SharedAccessKey=4kr1CM3nN/h84nK5IvUeGC/+L3Eill2DFlatP8UFV5Q=",
    "FUNCTIONS_WORKER_RUNTIME": "dotnet"
  }
}
[FUNCTION1.CS]
using Microsoft.Azure.WebJobs;
using Microsoft.Extensions.Logging;
using System;

namespace FunctionReadQueue
{
    public static class Function1
    {
        [FunctionName("ReadQueue")]
        public static void Run([ServiceBusTrigger("queueone", Connection = "queueConnString")]string myQueueItem, ILogger log)
        {
            if(string.Equals(myQueueItem,"Damiano"))
            {
                log.LogInformation($"Find the correct value ({myQueueItem}) at {DateTime.Now.ToString()}");
            }
            else
            {
                log.LogInformation($"Read item: {myQueueItem}");
            }
        }
    }
}
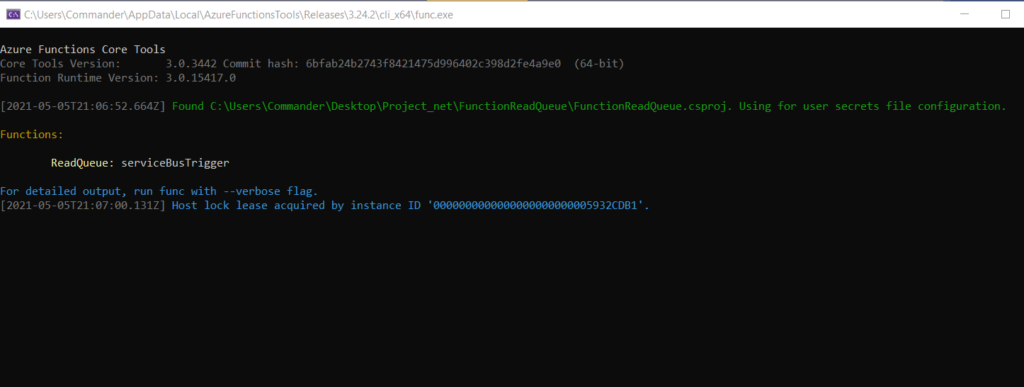
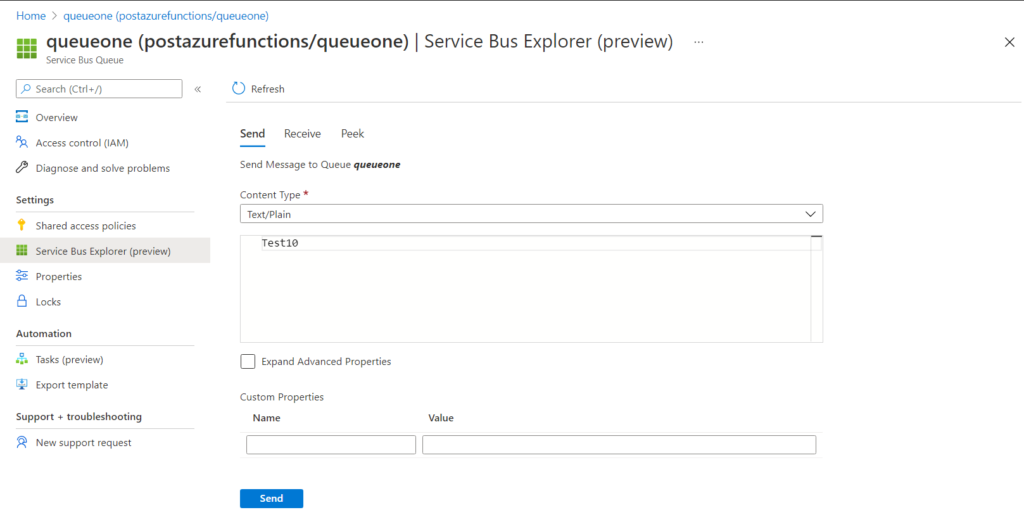
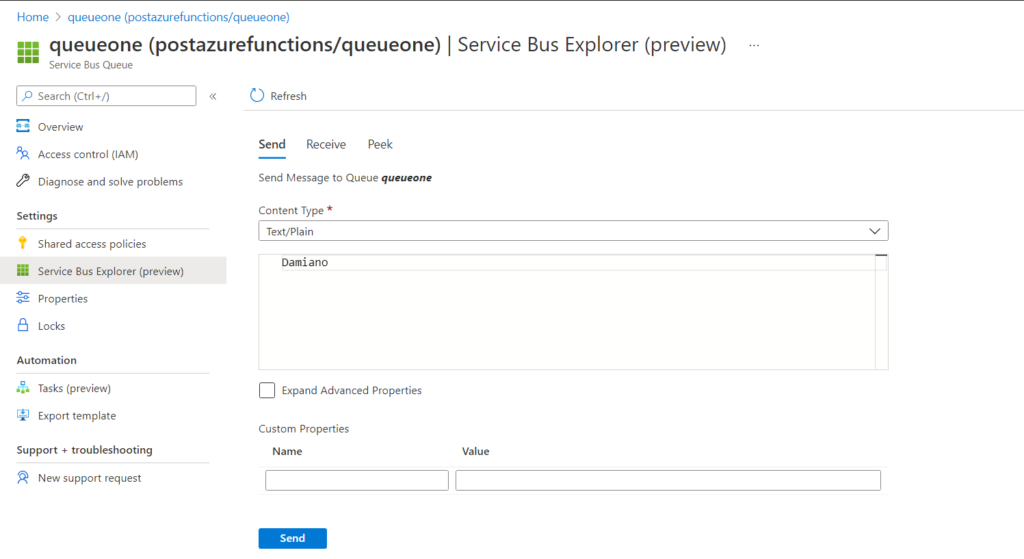
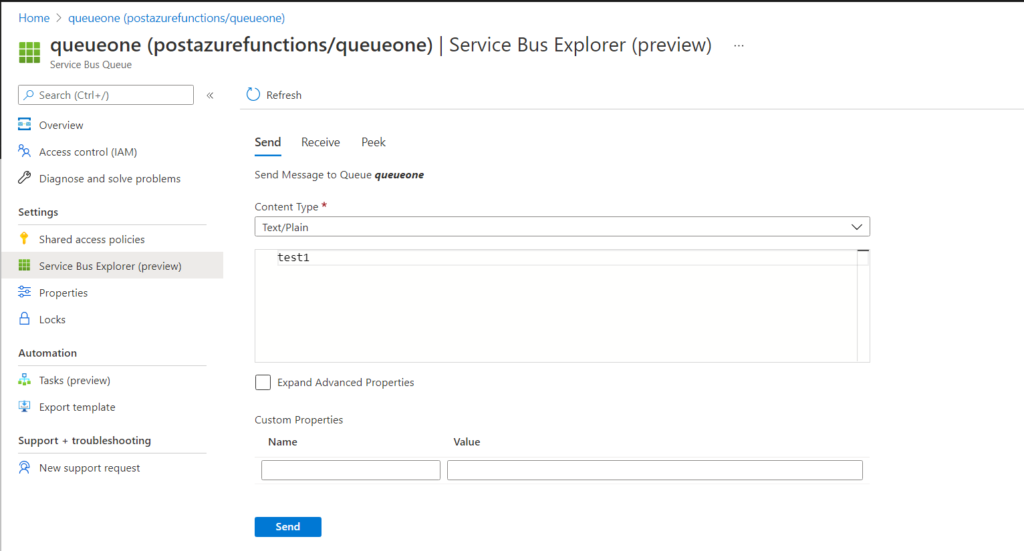
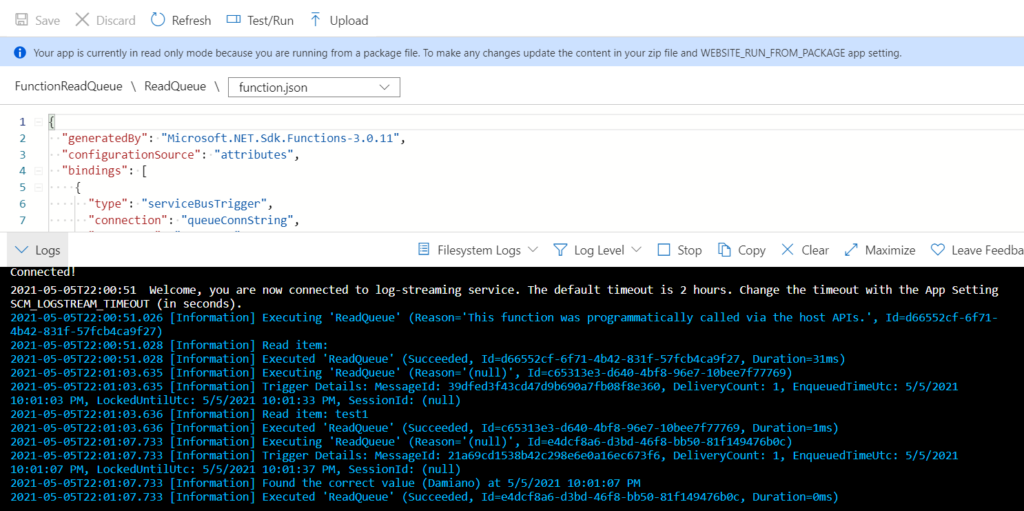
Now, in order to check it works fine, we run the Functions and we will write two messages in the queue:
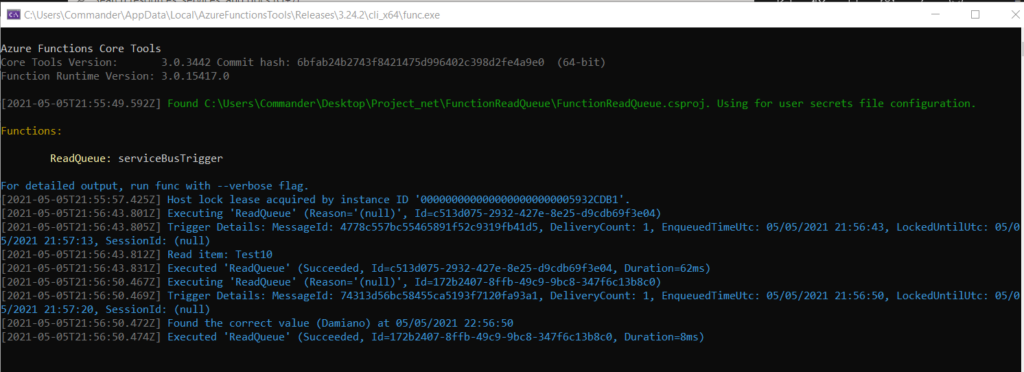
It works fine and now, we will deploy it on Azure.
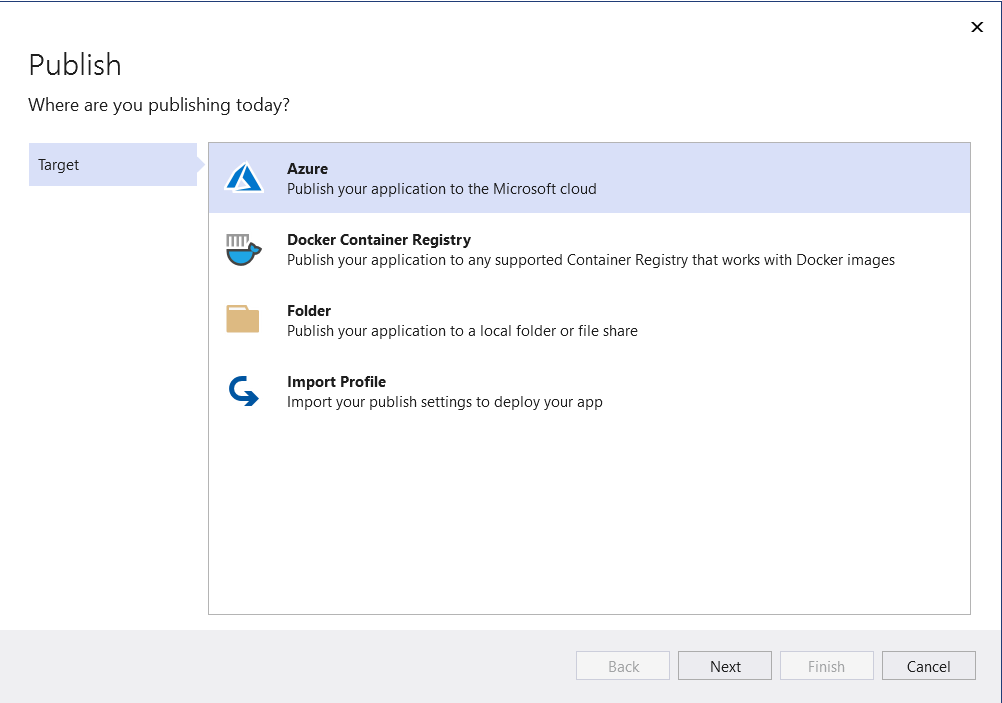
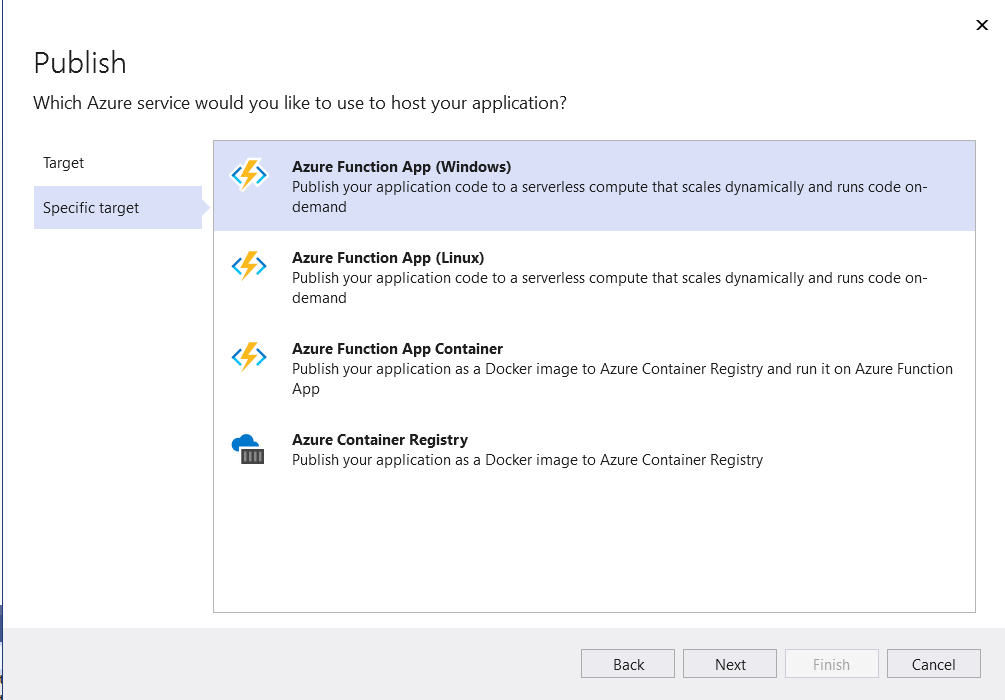
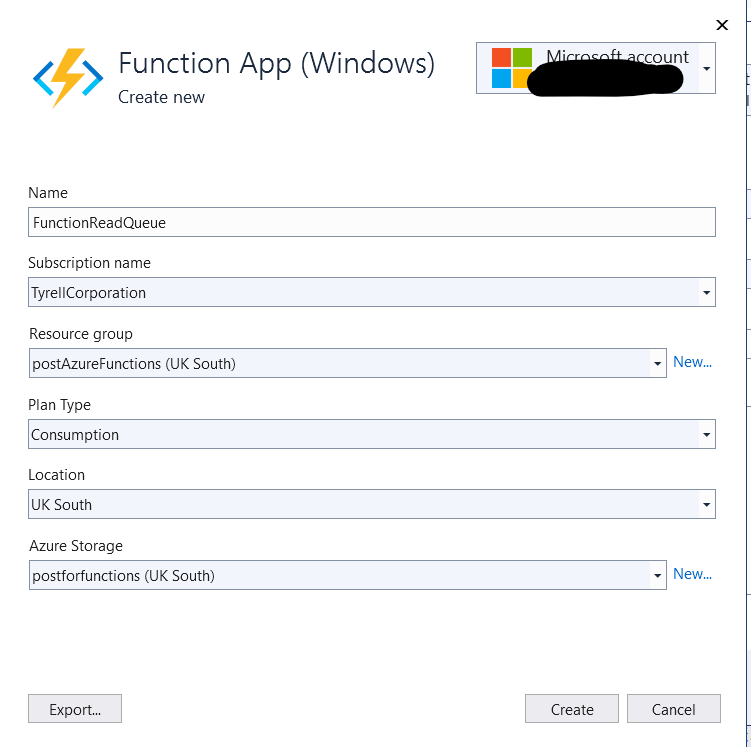
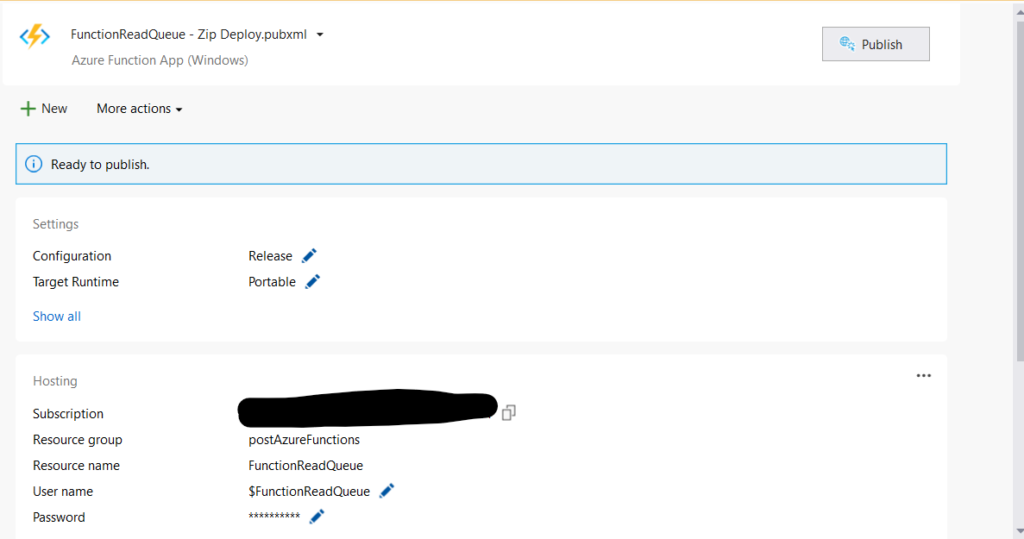
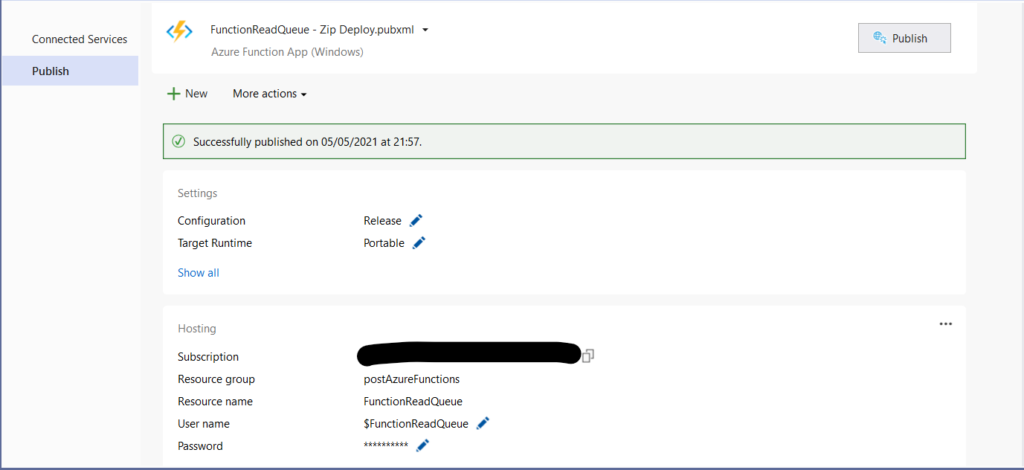
In Solution Explorer, right-click the project and select Publish, the we choose Create New and finally we select Publish:
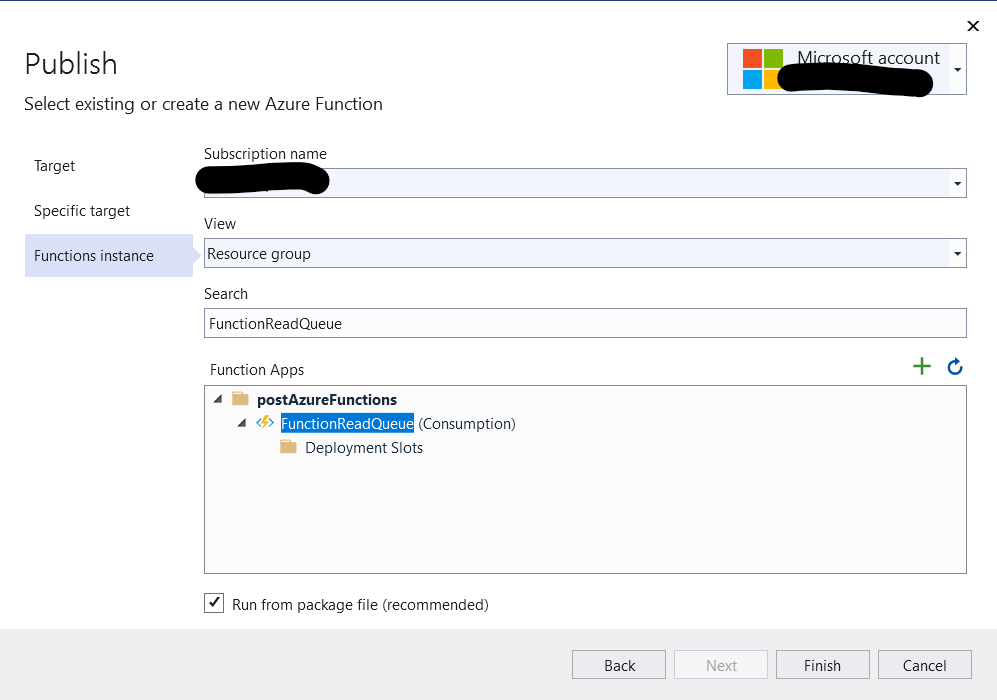
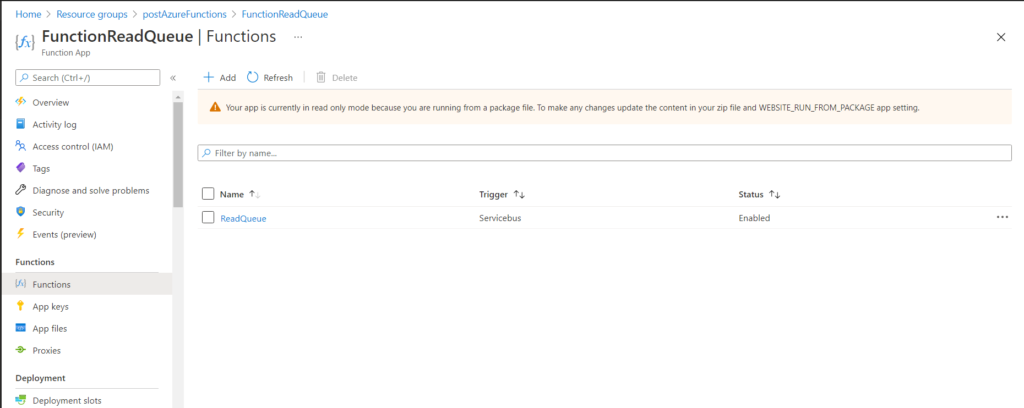
Now, if we go to Azure portal, we will see the new Azure Functions:
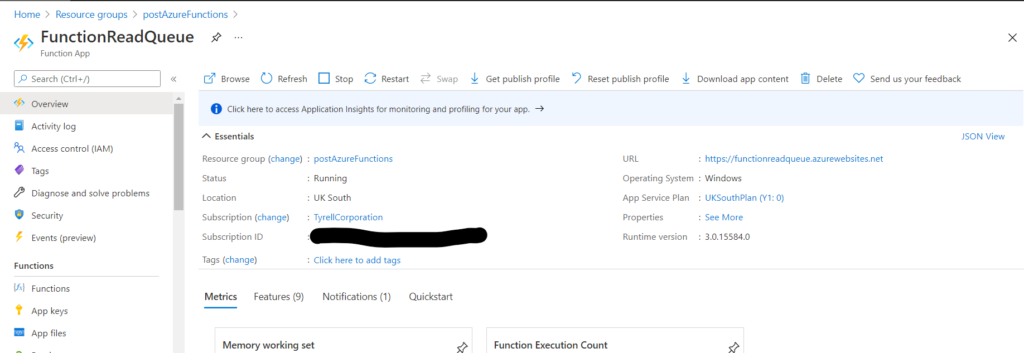
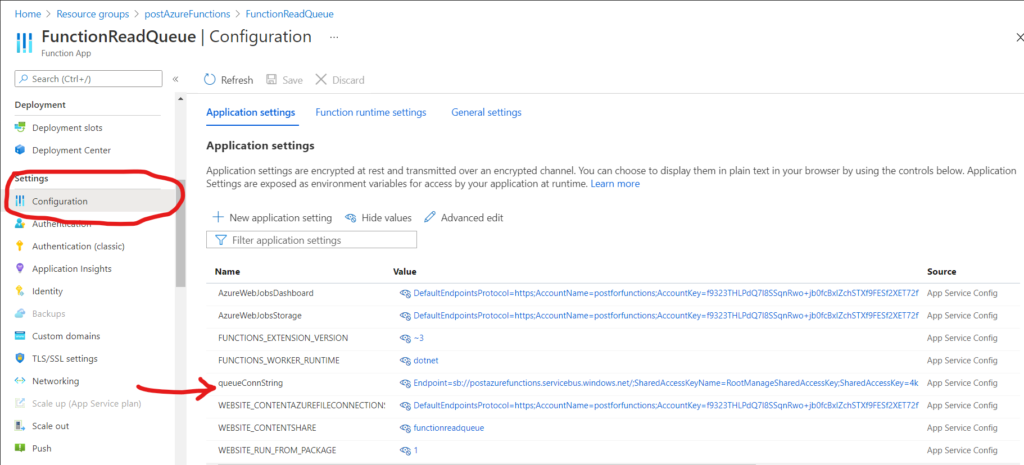
Before testing the Function, we have to add the Queue Connections String in the Configuration Settings:
Now, we can check the Azure Function:
THIS IS A VERY SIMPLE EXAMPLE OF HOW TO USE AN AZURE FUNCTION BUT, LIKE THE POST “Azure – Functions with Azure Portal”, I WANTED JUST TO SHOW HOW IS EASY CREATE AN AZURE FUNCTION.