
In this post, we will see the new container introduced in iOS 16 called NavigationSplitView that, we can use to create two or three column navigation interfaces.
It can be useful for apps that need to display a lot of content or for apps that want to provide a more immersive experience.
NavigationSplitView is more suitable for iPadOS and macOS apps but, it can also be used on apps for iPhone. The view component automatically adapts itself for iPhone. Instead of displaying a multi-column interface, it creates a single-column experience.
To use NavigationSplitView, we need to create a NavigationSplitView instance and then add two or three content closures to it. The content closures are responsible for providing the content for each column.
Let’s see some examples:
TEST_1
(with two columns):
import SwiftUI

struct ContentView: View {
    var body: some View {
        NavigationSplitView
        {
            Text("Menu")
        }
        detail:
        {
            Text("Detail Area")
        }
    }
}

struct ContentView_Previews: PreviewProvider {
    static var previews: some View {
        ContentView()
    }
}
If we run the application and we open the iPad simulator, the following will be the result:

TEST_2
(with three columns):
import SwiftUI

struct ContentView: View {
    var body: some View {
        NavigationSplitView
        {
             Text("Sidebar")
        }
        content:
        {
             Text("Primary View")
        } detail:
        {
             Text("Detail View")
        }
    }
}

struct ContentView_Previews: PreviewProvider {
    static var previews: some View {
        ContentView()
    }
}
If we run the application and we open the iPad simulator, the following will be the result:

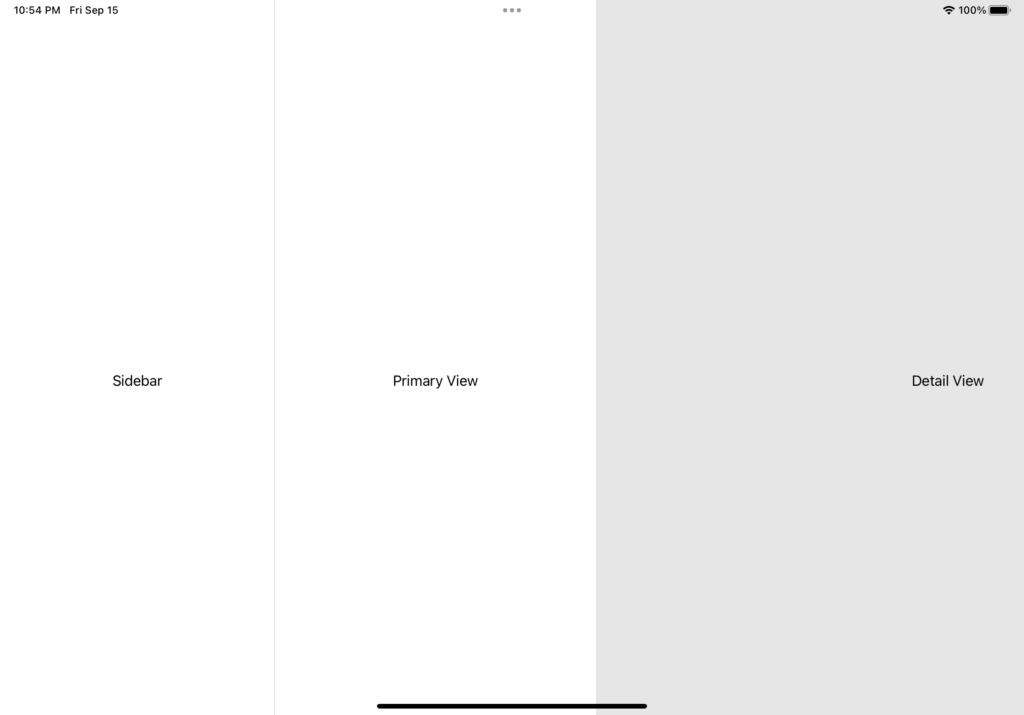
TEST_3
(in this last example, we will see how to manage a list of objects and how to show the details):
[CAR.SWIFT]
import Foundation

struct Car: Identifiable, Hashable {
    let id = UUID()
    let brand: String
    var model: String
    var year: Int
    var mileage: Int
}
[CARVIEWMODEL.SWIFT]
import Foundation

class CarViewModel
{
    private var lstCars = [Car]()

    // constructor
    init() {
        let car1 = Car(brand: "Toyota", model: "Corolla", year: 2023, mileage: 0)
        let car2 = Car(brand: "Honda", model: "Civic", year: 2022, mileage: 10000)
        let car3 = Car(brand: "Ford", model: "Focus", year: 2020, mileage: 20000)
        let car4 = Car(brand: "BMW", model: "3 Series", year: 2019, mileage: 15000)
        let car5 = Car(brand: "Mercedes", model: "C-Class", year: 2021, mileage: 8000)
        let car6 = Car(brand: "Audi", model: "A4", year: 2023, mileage: 5000)
        let car7 = Car(brand: "Chevrolet", model: "Malibu", year: 2018, mileage: 50000)
        let car8 = Car(brand: "Tesla", model: "Model 3", year: 2023, mileage: 1000)
        let car9 = Car(brand: "Hyundai", model: "Elantra", year: 2022, mileage: 12000)
        let car10 = Car(brand: "Kia", model: "Forte", year: 2021, mileage: 18000)

        lstCars = [car1, car2, car3, car4, car5, car6, car7, car8, car9, car10]
    }

    func GetAllCars() -> [Car] {
            return lstCars
        }
}
[CARDETAILVIEW.SWIFT]
import SwiftUI

// Define a CarDetailView struct that conforms to the View protocol
struct CarDetailView: View {

    // Declare a @Binding property to hold a reference to a Car object
    // @Binding allows this view to have a two-way connection to the Car object it receives
    @Binding var car: Car

    // The body property defines the content and behavior of the view
    var body: some View {

        // A vertical stack (VStack) to hold and arrange child views in a vertical line
        VStack(alignment: .leading, spacing: 10) {

            // A flexible space that expands along the major axis of its containing stack layout
            Spacer()

            // Text view to display "Car Details" with customized font and padding
            Text("Car Details")
                .font(.largeTitle)
                .fontWeight(.heavy)
                .padding(.bottom, 20)

            // Horizontal stack (HStack) to hold and arrange "Brand:" label and the car's brand in a horizontal line
            HStack {
                Text("Brand:")
                    .font(.headline)
                    .fontWeight(.semibold)
                Spacer()
                Text(car.brand)
                    .font(.body)
                    .foregroundColor(.gray)
            }

            // HStack for displaying "Model:" label and the car's model
            HStack {
                Text("Model:")
                    .font(.headline)
                    .fontWeight(.semibold)
                Spacer()
                Text(car.model)
                    .font(.body)
                    .foregroundColor(.gray)
            }

            // HStack for displaying "Year:" label and the car's year
            HStack {
                Text("Year:")
                    .font(.headline)
                    .fontWeight(.semibold)
                Spacer()
                Text("\(car.year)")
                    .font(.body)
                    .foregroundColor(.gray)
            }

            // HStack for displaying "Mileage:" label and the car's mileage
            HStack {
                Text("Mileage:")
                    .font(.headline)
                    .fontWeight(.semibold)
                Spacer()
                Text("\(car.mileage) miles")
                    .font(.body)
                    .foregroundColor(.gray)
            }

            // Another spacer to ensure the content remains centered vertically
            Spacer()
        }
        // Modifiers applied to the VStack to add padding, background color, corner radius, shadow, and horizontal padding
        .padding()
        .background(Color.white)
        .cornerRadius(15)
        .shadow(radius: 10)
        .padding(.horizontal)
    }
}

// Preview provider to render previews of the CarDetailView in Xcode
struct CarDetailView_Previews: PreviewProvider {

    // A @State property to hold a Car object for previewing the view
    @State static private var previewCar = Car(brand: "Toyota", model: "Corolla", year: 2023, mileage: 1000)

    // Defines the previews for the CarDetailView
    static var previews: some View {
        CarDetailView(car: $previewCar)
    }
}
[CONTENTVIEW.SWIFT]
import SwiftUI

// Define a ContentView struct that conforms to the View protocol
struct ContentView: View {
    // Declare a @State property to hold the list of cars,
    // initializing it with a list of all cars retrieved from the CarViewModel
    @State var lstCars = CarViewModel().GetAllCars()

    // Declare a @State property to hold the selected car, initially set to nil
    @State private var selectedCar: Car?

    // The body property that defines the content and behavior of the view
    var body: some View {
        // Define a navigation split view to show a list of items and a detail view
        NavigationSplitView {

            // Define a list that displays each car in lstCars
            List(lstCars, selection: $selectedCar) { car in

                // Define a navigation link that navigates to the detail view for the selected car
                NavigationLink(value: car) {
                    Text(car.brand)
                }
            }
        }
        // The detail part of the navigation split view
        detail: {

            // Check if a car is selected
            if let selectedCar = selectedCar {
                // If a car is selected, show the detail view for that car
                CarDetailView(car: .constant(selectedCar))
            } else {
                // If no car is selected, show a placeholder text
                Text("Detail Area")
            }
        }
    }
}

// Define a preview provider to preview the ContentView in the canvas or in Xcode previews
struct ContentView_Previews: PreviewProvider {
    static var previews: some View {
        ContentView()
    }
}
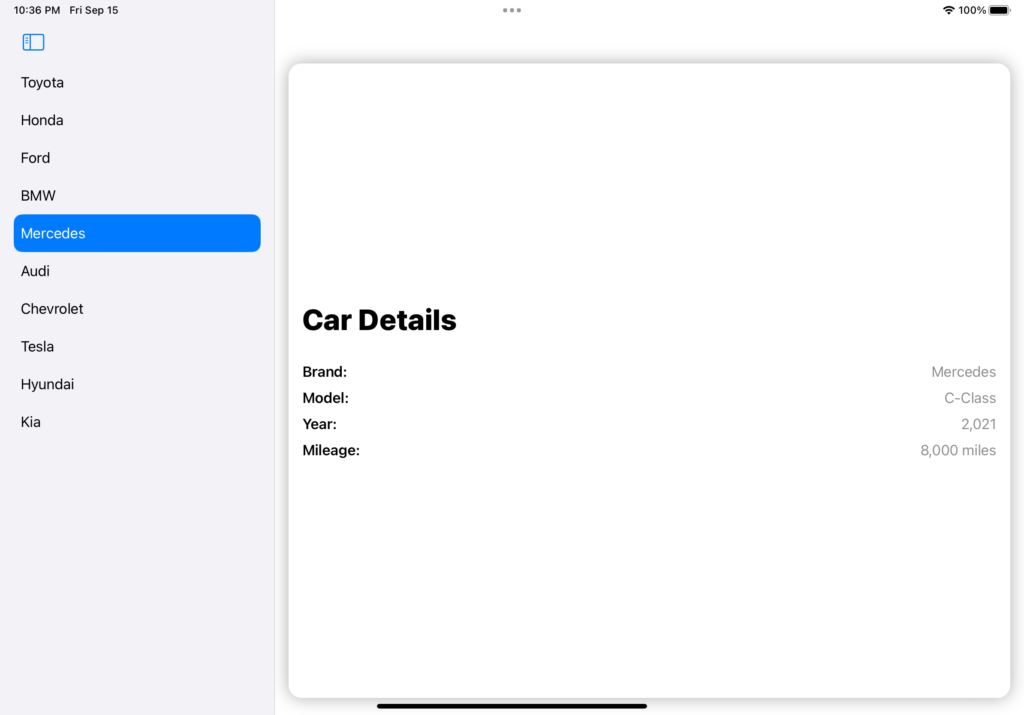
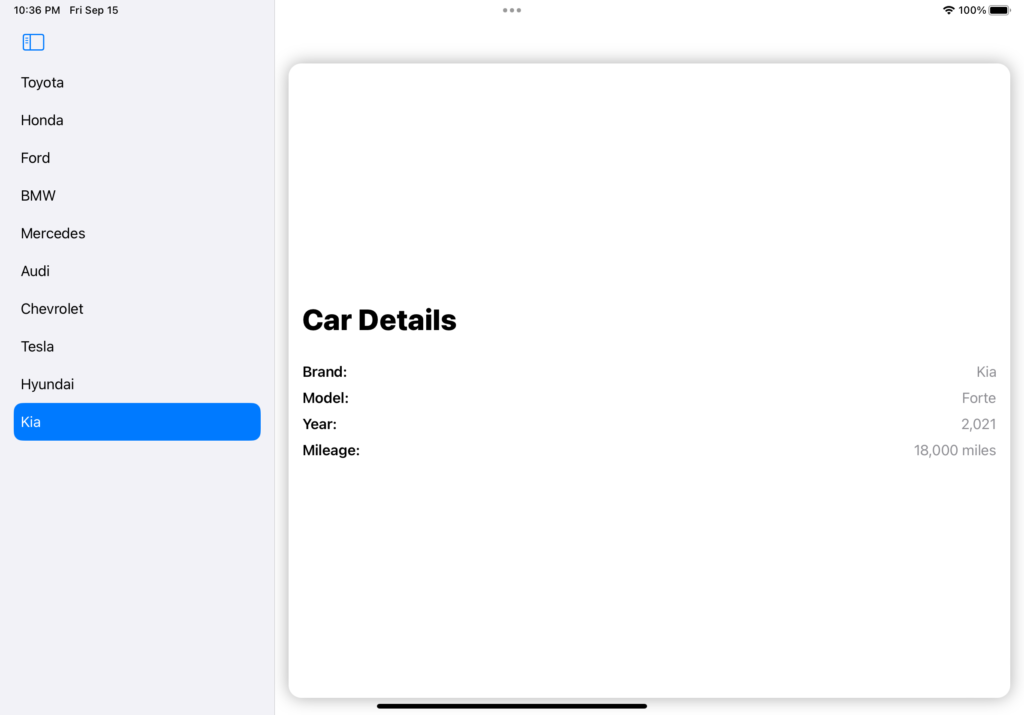
If we run the application and we open the iPad simulator, the following will be the result:


Of course this post is just an introduction to NavigationSplitView which is very powerful and easy to customize.
For all information, we can consult the Apple developer web site.